Writing a book or a thesis involves seemingly endless revisions and it can be very difficult to keep track of them. Also, constant tinkering doesn’t always improve matters. With Scrivener you can take a Snapshot of your current document before editing and then revert or roll back to the original version if it ends up looking worse.
I really struggled with the word count in my thesis (it was around 20,000 too many), so Snapshots helped me experiment with removing quotes and peripheral arguments. Sometimes the impact was too great in later chapters, so I was able to roll back to the original version.
Taking Snapshots
To take a snapshot, make sure you have the document open or selected in the Binder, then press Cmd + 5 on Mac or Ctrl + 5 on Windows. You’ll hear the satisfying sound of a camera shutter. If the keyboard shortcut doesn’t work, you can go to the Menu Bar and click Documents > Snapshots > Take Snapshots of Selected Documents.
ℹ️ If you’ve selected multiple documents, you’ll get a Snapshot for each of them.
To view Snapshots, click the Snapshots icon (the tiny camera) in the Inspector. If there’s a dot next the camera, you have Snapshots of that document.
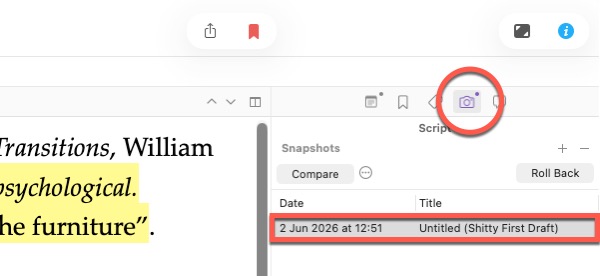
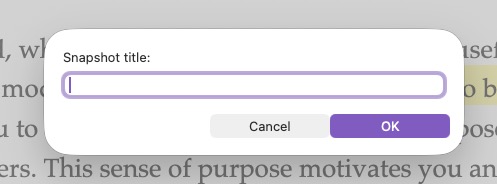
The time and date of the Snapshot is logged, along with the status (if you’ve set one). Double-click the Snapshot title to rename it. Alternatively, if you use the keyboard shortcut Ctrl + Shift + 5, it’ll prompt you for a title before taking the Snapshot.
Rolling back to previous snapshots
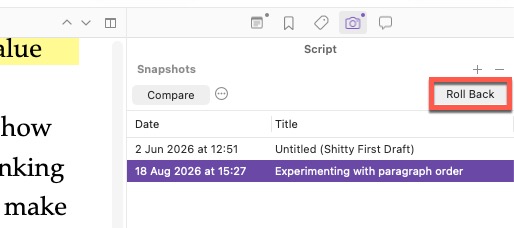
Select the relevant Snapshot in the Inspector and click Roll Back.
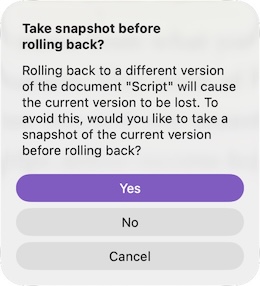
Scrivener prompts you to take another Snapshot before rolling back. Otherwise, you’ll lose the most recent changes.
Just above Roll Back, you’ll see plus and minus signs. You can use these controls to add or delete Snapshots.
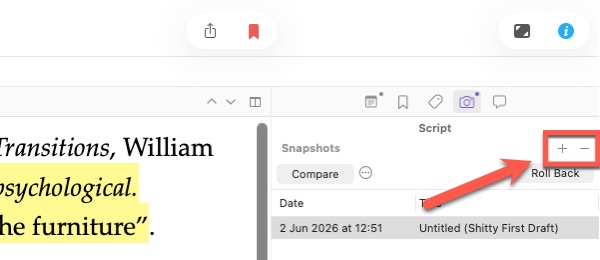
ℹ️ Snapshots also save annotations, comments, and footnotes, so this is a very powerful feature. It’s always worth taking a Snapshot before deleting bits of your document, as you never know when they’ll come in handy for journal articles, conference papers, or blog posts.
Comparing Snapshots
You can compare Snapshots within your current document by selecting a Snapshot in the list and then clicking Compare. You’ll then see the differences between the Snapshot and the current version in the pane below.
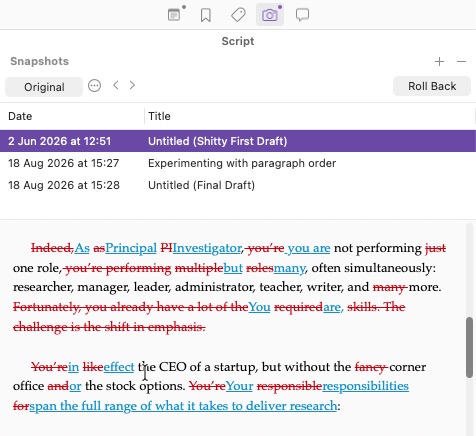
Alternatively, you can view the Snapshot in the Editor by clicking and dragging it onto the Document Header. This just shows the text, though. To view the changes, too, hold down the Option key (Mac) or Alt key (Windows) as you drag.
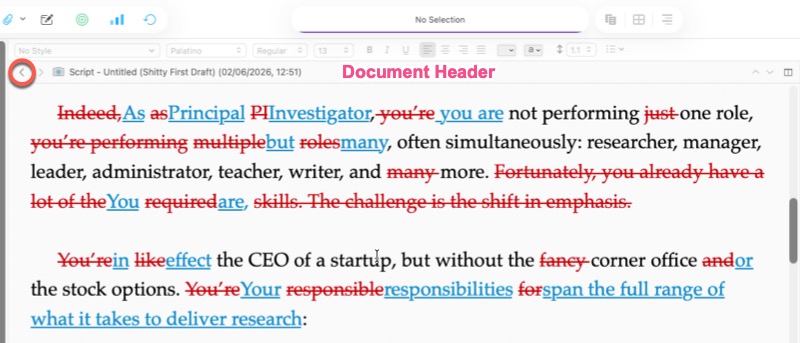
Click the back arrow to return to the Document.
Using the Snapshots Manager
If you have a lot of Snapshots, it might be easier to view them all in one place. In the Menu Bar, click Documents > Snapshots > Show Snapshots Manager. Now you’ll see a compete list of Snapshots in your Project from where you can Compare, Roll Back, or Delete.
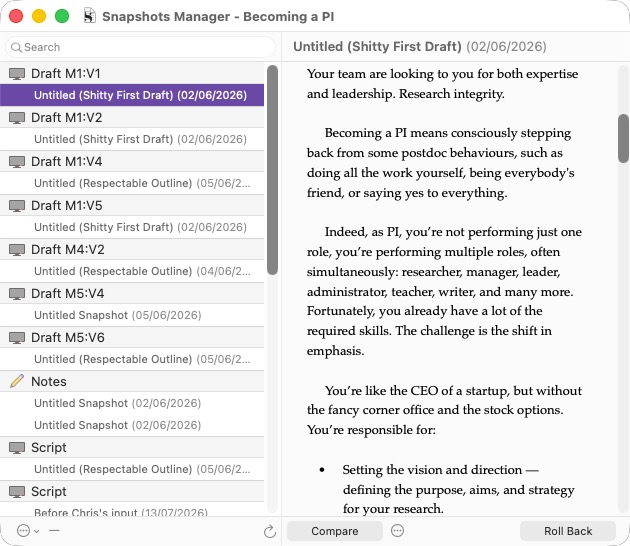
Click the ellipsis at the bottom of the Snapshots Manager to choose the level of detail — do you want to see the changes by word, clause, or paragraph?
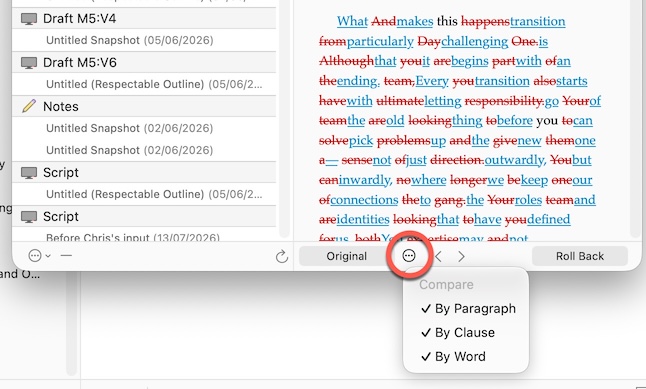
Here I’m just viewing details at paragraph level:
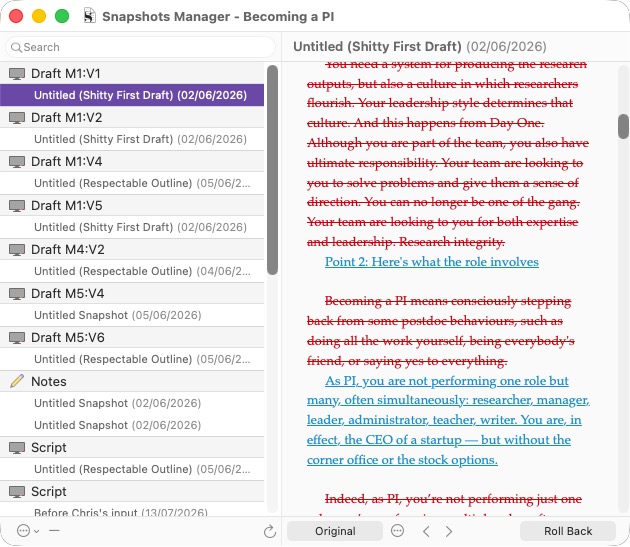
With the arrows at the bottom, you can jump between the changes. This is similar to the track changes feature in Word, where you can navigate to the next change in the Review panel.
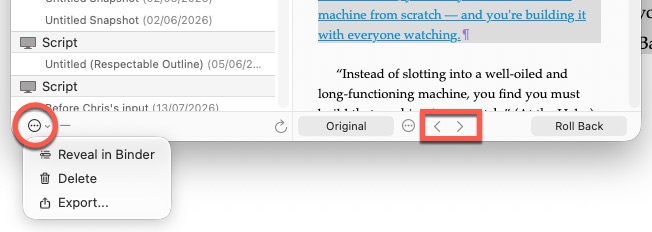
The ellipsis on the left-hand side of the Snapshots Manager offers some additional options. Here you can find the selected document in the Binder (Reveal in Binder), delete the selected Snapshot, or export the selected Snapshot as an RTF file.
Snapshots workflow
You just need to remember to take a Snapshot every time you make big changes. You can make this easier for yourself in the Scrivener preferences. Go to Scrivener > Settings and click Saving in the left-hand menu. Check the box that says Take snapshots of changed text documents on manual save.
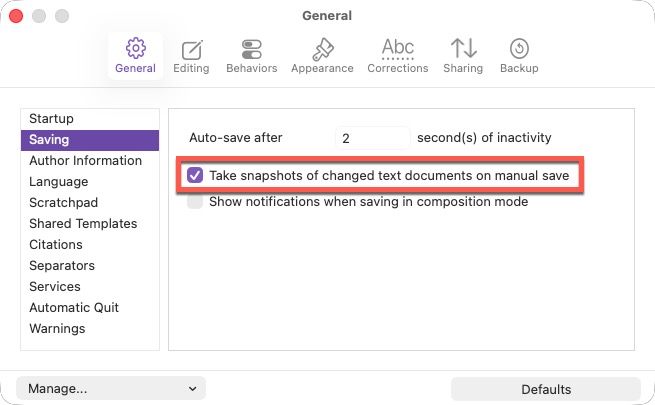
With this box checked, each time you press Cmd + s (Mac) or Ctrl + s (Windows), Scrivener takes a Snapshot of every document you’ve edited. You still need to remember to save, but only once.
⚠️ If you permanently delete a document, you’ll also lose the Snapshots. Before deleting documents, it’s a good idea to take a Project Backup, under File > Back Up > Back Up Now.
Once you’ve got your own workflow with Snapshots, it’s a feature that’ll make your writing a lot smoother. Unless you’re willing to use a proper version control system like Git, there are few writing tools that give you this much control. This is an area in which Scrivener really shines.
Stuck with Scrivener? I offer 1-2-1 coaching on building your confidence and improving your workflow.