As you’ve no doubt discovered, writing is much easier when you have all your notes and research material to hand. This is one of the many reasons I love Scrivener, as the Research folder helps me keep everything together and display it alongside my writing. The split screen feature means I can easily refer to a journal article as I work, and also quickly copy across the quotes that I’m discussing.
Scrivener can also display webpages, images, audio, and even videos. When you import a file, Scrivener takes a copy, so you don’t need to worry about messing up your original version.
Importing files into your Scrivener Research Folder
There are two main ways to add files to your Research Folder:
- Drag the file from elsewhere on your computer.
- Right-click the Research folder in the Binder, then click Add > Existing Files.
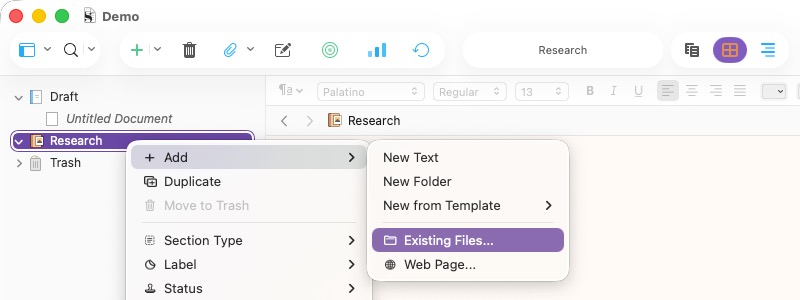
If the file is text-based, for example a Word document, it’ll be converted to Rich Text Format. Otherwise, Scrivener preserves the format. For PowerPoint slides, it’s best to convert them to PDF format before importing. Then Scrivener can display them correctly.
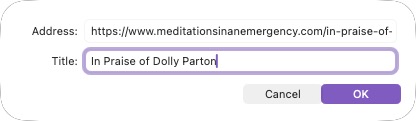
You can also add webpages by choosing Add > Web Page and pasting the URL. It automatically pastes whatever’s on your clipboard. You can also give the page a title. Scrivener stores a snapshot of the webpage, so it won’t be updated.
⚠️ As Scrivener copies the files, anything you import into the Research Folder increases the size of your project. This means your backups consume more space and bandwidth. Also, you might experience some lag with giant files.
Organising the Research Folder
As with your Draft, you can create sub-folders within the Research Folder. This is helpful for grouping content together, such as journal articles, videos, images, or transcripts. Characteristically for Scrivener, there are at least three different ways of creating a new folder:
- Click the little folder icon at the bottom of the Binder.
- Use the keyboard shortcut of Cmd + Option + n (Mac) or Ctrl + Alt + n (Windows).
- Right-click the Research folder in the Binder and choose Add > New Folder.
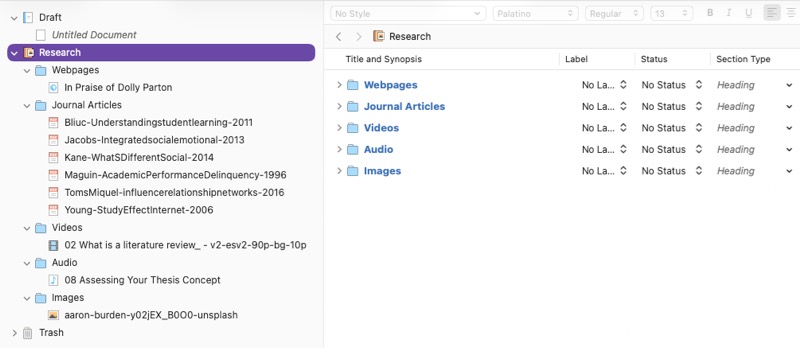
Most of the features in the Draft also work in the Research folder. For instance, you can add labels, keywords, and notes.
Using meta-data in the Research folder
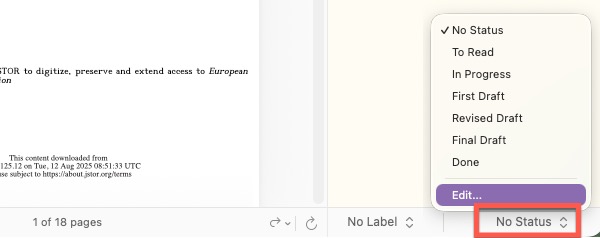
You might have already used statuses in your Draft folder to denote your progress on a document, e.g. First Draft, Revised Draft, Final draft, etc. Well, you can also assign a status to the documents in your Research Folder. I like setting a status to see whether I’ve read a journal article. Otherwise, I get halfway through and think, “Hmm, this seems familiar” 🧐
Set the Status as usual in the bottom right-hand corner:
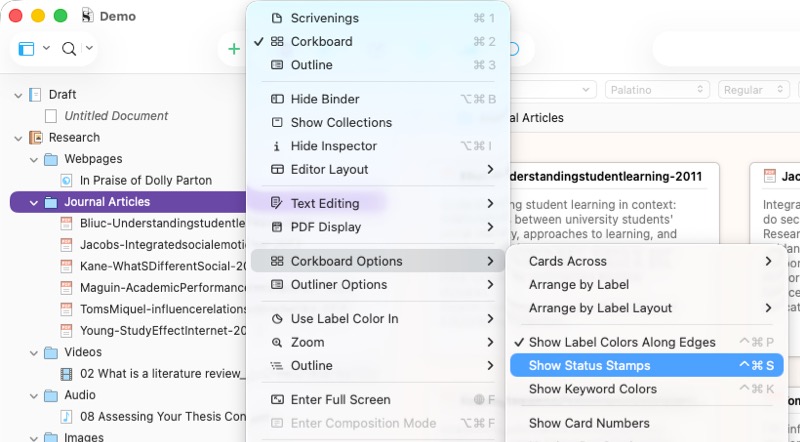
Then on the menu bar click View > Corkboard Options > Show Status Stamps.
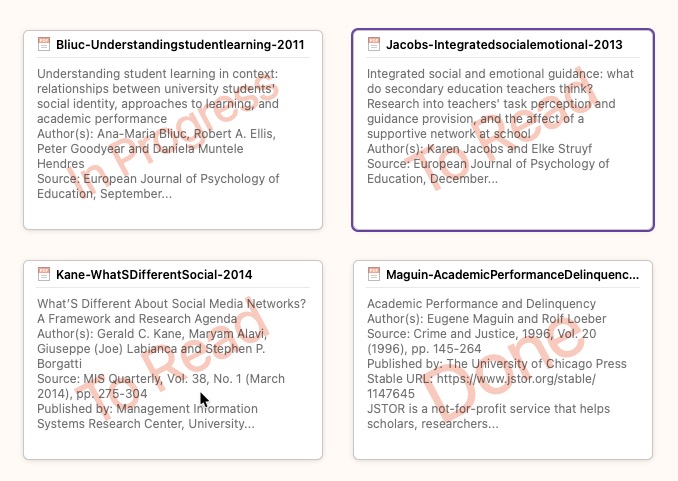
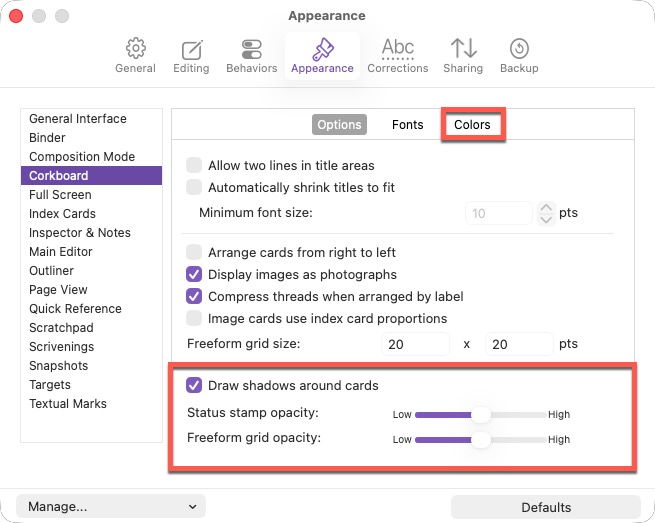
By default, the stamps are faint and a yucky colour. You can change the opacity and colour in the Scrivener settings:
I can also use the synopsis (the virtual index card) to jot down the key points of the article, or to make some notes on how I’m going to engage with it. That way I don’t have to keep opening and rereading the article to remind myself what it’s about.
Using Split-screen mode in Scrivener
Once your research material is imported, you can display it alongside your writing. Click either the vertical split or horizontal split icon above the editor:
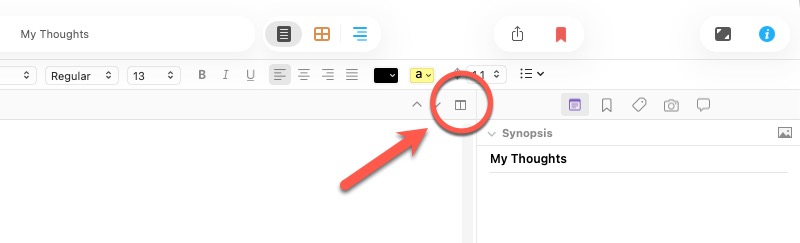
Then you’ll see two panels:
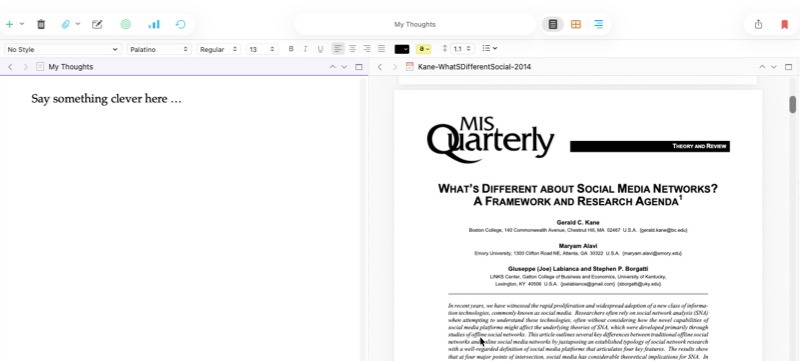
As you start clicking through your various documents, they have a tendency to pop up in unexpected places. It’s very annoying to accidentally open a journal article in the window where you’re trying to write. To avoid this problem, right-click the tiny document icon (this icon looks different, depending on the document type) just below the formatting toolbar and choose Lock in Place. Now your document won’t budge unless you unlock it again.
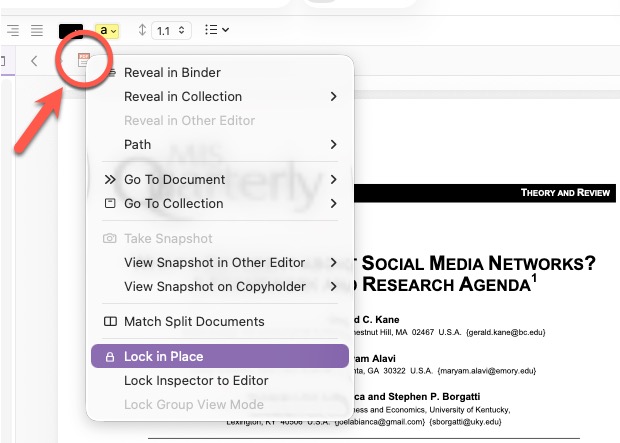
The bar across the top of your document turns a darker shade of grey to indicate that it’s locked and you’ll also see a tiny padlock 🔒 To unlock it, right-click the icon again and uncheck Lock in Place.
The Inspector displays the details of whichever panel is currently selected. If you want it to reflect a specific document, make sure that document is selected, then right-click the document header and choose Lock Inspector to Editor.
Working with different media types in the Research folder
If you’re viewing a PDF, you’ll see some additional information in the Footer Bar. Here, you can navigate through the pages using the arrows and also open the PDF in an external application, such as Adobe Acrobat.1 If you make changes to your PDF in that external application, they’ll be saved to the version stored in Scrivener, too. This is helpful if you want to add highlights or annotations. Click the reload icon to make sure your changes are visible.
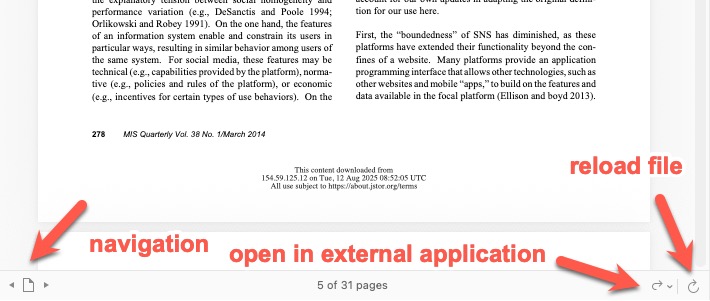
With a PDF displayed alongside your Editor, it’s easy to copy and paste text, such as quotes. To zoom in and out, right-click the PDF for options.
If you’re viewing a video or audio file in the Research Folder, you’ll see some media controls for playing, pausing, rewinding, and fast-forwarding. You can also use Cmd + enter (Mac) or Ctrl + enter (Windows) to play and stop. This keyboard shortcut works even if you’re typing in the other Editor.
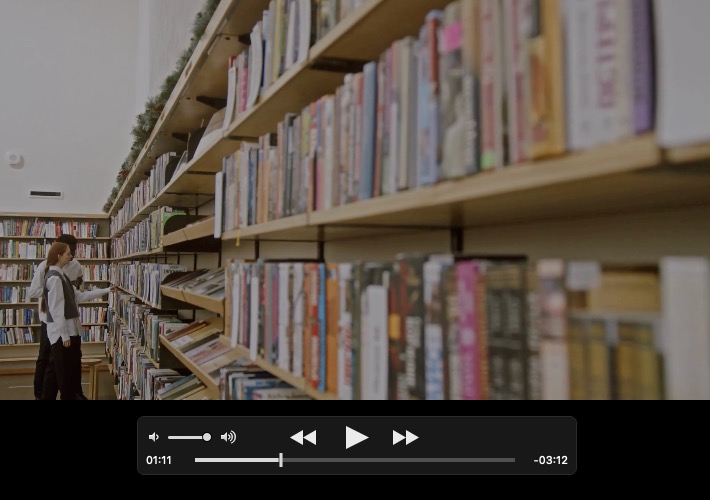
It’s great for transcription (although Macwhisper is a lot faster). Scrivener also rewinds a few seconds each time you stop. This reminds you of the context and gives you a chance to get your fingers in the right place. As before, you can add a status to these files - useful if you want to flag which have been transcribed.
Conclusion
Researchers often ask me whether this method involves duplication of effort if they’re already using note-taking apps and Zotero for managing research material. The short answer is yes. In my longer answer, I explain that the effort is minimal, and the reward significant. It’s simply a case of copying notes into Scrivener, which takes a matter of seconds. A solution doesn’t have to be perfect, it just needs to offer significant benefits. That’s exactly what Scrivener does.
Stuck with Scrivener? I offer 1-2-1 coaching on building your confidence and improving your workflow.
Scrivener uses the default PDF viewer for your computer, so you specify it in the main settings, rather than in Scrivener itself. ↩︎