Now that software has become so bloated, it can take 20 minutes just to resize an image. Most of that time is spent rebuffing pointless AI features that are also bumping up the subscription 😩 Increasingly, I’m using ImageMagick for my image manipulation. ImageMagick is a free, open-source CLI tool for creating, editing and converting bitmap images. As it only runs on the command line, it takes some geting used to. But once you’ve grasped a few techniques, it’ll save you heaps of time. You can also combine it with other tools to automate routine tasks.
In this post, I’ll explain how to get started with ImageMagick, using the most common commands.
Installing ImageMagick
ImageMagick is available for Mac, Windows, and Linux. You’ll find executables on their download page. If you’re a Mac user, the easiest installation method is with Homebrew:
brew install imagemagick
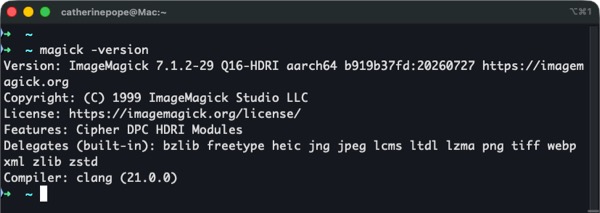
You can run magick -version in your terminal to check it’s installed.
Using ImageMagick
There are a bazillion commands, and the user manual can be overwhelming for beginners. The format is:
magick- Name of original file
- Process you want to apply
- Parameters for that process
- Name of the output file
For example, this command takes a image called carrot.jpg, rotates it 45 degrees, then saves it as rotated.jpg.
magick carrot.jpg -rotate 45 rotated-carrot.jpg
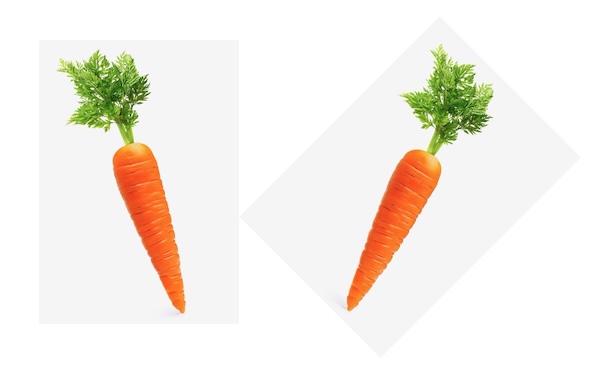
You can use a negative number to rotate the other way:
magick carrot.jpg -rotate -45 rotated-carrot.jpg
Perhaps the trickiest part is typing the first word correctly. If I had a pound for every time I typed magic instead of magick, I could afford an Adobe subscription.
You can mirror an image with the flop command:
magick photo.jpg -flop mirrored.jpg
Or flip it upside down:
magick photo.jpg -flip upside-down.jpg
To resize an image, adapt this command:
magick photo.jpg -resize 50% smaller-photo.jpg
The aspect ratio is maintained.
You can also convert the image format with the resize command. For example, you could specify .png as the output file:
magick photo.jpg -resize 50% smaller-photo.png
ℹ️ If you convert from .png to .jpg, you’ll lose any transparency.
To convert from colour to greyscale:
magick photo.jpg -colorspace Gray greyscale.jpg
To add a border:
magick photo.jpg -border 3 -bordercolor black bordered.jpg
This command adds a 3px black border.
You can also combine commands. This example rotates and resizes the image:
magick photo.jpg -rotate 45 -resize 50% rotated-resized.jpg
Operations are applied from left to right: it rotates first, then resizes the result.
This example resizes the image and compresses it:
magick photo.jpg -resize 50% -quality 85 smaller-compressed-photo.jpg
Batch processing in ImageMagick
If you have a lot of images to process, ImageMagick saves you some serious time. Here’s an example of a script you could run:
for file in *.jpg; do
    magick "$file" -resize 50% "resized-$file"
done
This script finds all the .jpg files in the current directory and resizes them to 50% of the original. The filenames of the resized images are prefixed with resized-. This overwrites any existing files with the same name. The " " around the filenames prevent problems with spaces.
⚠️ It’s important to test any batch commands on one file before running a script.
Batch processing is even more powerful when you automate it. Mac users could create an Automator task that allows you to command-click a folder and automatically resize all the images inside. With Hazel, you could watch a folder and automatically resize any images you add to it. I explain how to do that in another post.
For now, I’m hoping these ImageMagick commands will streamline your workflow. Thank you to the developers for such an excellent tool.