While Scrivener’s Research folder is marvellous for keeping reference material alongside your writing, you can end up a huge project. Large files slow everything down and make it less stable. In this post, I’ll explain how you can create bookmarks to link to existing files elsewhere, rather than copying them to your project.
What are Scrivener bookmarks?
There are three types of bookmark in Scrivener:
- Internal: this is just a pointer to another document within your Scrivener project (I’m not going to cover this one).
- External: a URL for a webpage or a local file.
- External file: a link to a file that’s stored on your computer.
You can create them for specific documents, or for your entire project. Project bookmarks are useful for documents like style guides that you need to refer to repeatedly.
Bookmarks live in the Inspector, under the tab that resembles a ribbon. If you’ve created any bookmarks, you’ll see a tiny dot next to the icon. No, that’s not a squashed bug on your screen.
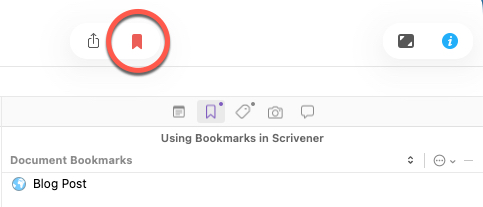
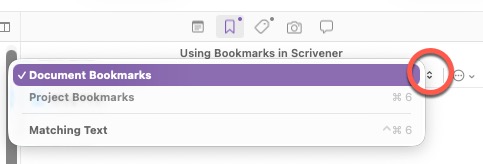
Click the arrows to switch between Document and Project Bookmarks.
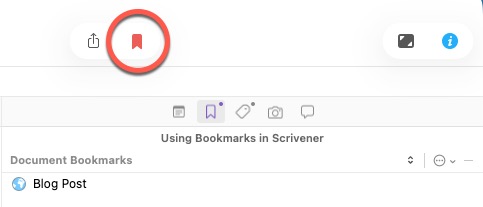
You can also access your Project bookmarks through the larger ribbon icon on your toolbar.
Let’s see how they work.
Creating an external bookmark in Scrivener
The most common use case for external bookmarks is to link to a webpage that you want to refer to while writing. You can add webpages to your Research folder, but with that method Scrivener takes a copy or snapshot. That means you won’t see any updates. In some cases, that’s exactly what you want. For live information, it’s better to create an external bookmark. This way, you get everything - including those annoying cookie notices.
In the Inspector, click the Bookmark (ribbon) icon, then the circle with the ellipsis.
Choose Add External Bookmark.
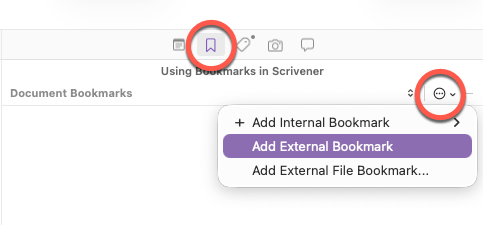
You’re then prompted to add the URL and the title.
Once that’s done, you’ll see it displayed in the Bookmarks pane.
You can click on the bookmark to launch the webpage in your browser. Or click Load Web Page in the pane below to display it within Scrivener.
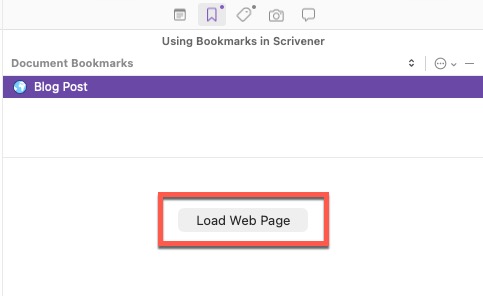
To edit or delete the Bookmark, right-click it.
This Bookmark type also works well with some applications. For instance, I use Obsidian for note-taking, an app that creates private URLs for all my notes in this format:
obsidian://open?vault=main&file=notes
This means I can bookmark a specific Obsidian note in Scrivener. When I click on the link in the Inspector, Scrivener launches Obsidian and opens that specific note. Nifty.
I could copy that note to Scrivener, but that duplicates effort and versions.
Creating an external file bookmark
To link to a file such as a PDF, choose External File Bookmark from the menu, then locate the file on your computer. Or you can drag and drop the file into the Bookmarks pane.
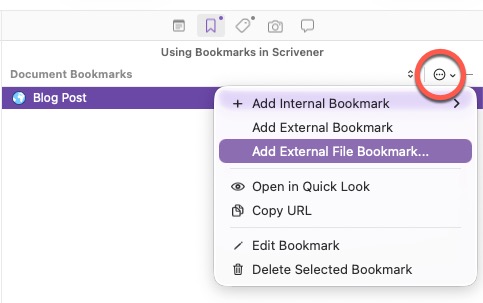
This works for PDFs, Word documents, spreadsheets, and images. You’ll see a preview in the pane below your bookmarks.
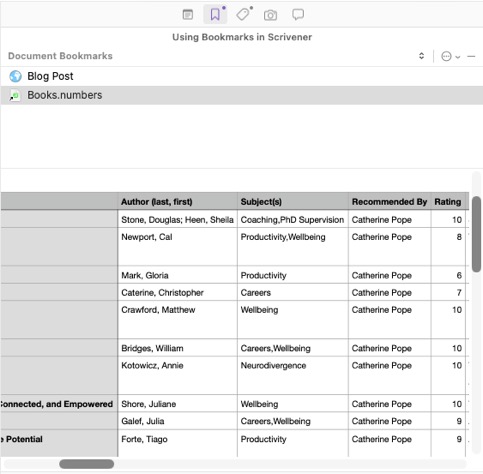
If you update that file, the changes are reflected in Scrivener.
Alternatively, for Project-wide bookmarks, you could click the Bookmarks icon in the toolbar, then drag and drop the files.
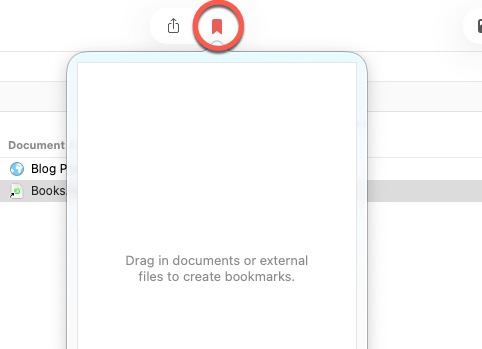
As is often the case in Scrivener, there are many different ways of performing the same task. This means you can find a workflow that suits you.
Conclusion
Bookmarks are a great way of quickly accessing the reference material you need, without bloating your Scrivener project. Sometimes, you want a copy in your Research Folder, but other times, a link is the most appropriate choice.
Happy Scrivening.
Stuck with Scrivener? I offer 1-2-1 coaching on building your confidence and improving your workflow.